STAGE ONE
Using various media, large, bold marks were made relating to gulls, specifically as an interpretation of Image 239. Dimensions are given so you know the size.
Image 291 - 28cmWx25cmH
Permanent ink markers
Image 292 - 28cmWx25cmH
Sponged paper, Black Carbon and Brown Artgraf from Art Van Go (these are glorious to use) and Inktense Block.
Image 293 - 28cmWx26cmH
Sponged paper, Inktense Blocks and Koh-I-Noor Water Soluble Wax Aquarells.
Image 294 - A4
Sponged Dark Blue Tiziano Paper with Koh-I-Noor Water Soluble Wax Aquarells, dipped in water before using.
Image 295 - A4
Dark Blue Tiziano Paper and thin bleach applied with 10mm baker's brush.
Image 296 - 50cmWx35cmH
Black tissue paper and thin bleach applied with pliable bramble stem with fraying ends.
Image 297 - 62cmWx56cmH
Poster paint applied with 50mm sponge brush
Image 298 - 66cmWx56cmH
Poster paint applied with 25mm sponge brush
And now for something completely different, an interpretation of Image 134.
Image 299 - 23cmWx24cmH
PITT artist pens
STAGE 2
I selected small areas from various drawings and made new design compositions.
Designs from Image 292
Image 300 - 20cmWx18cmH
Selected and rotated sections
Image 301 - 18cmWx20cmH
Image 300 rotated 90degrees right
Image 302 - 48cmWx18.5cmH
Horizontal repeat pattern
Image 303 18.5cmWx48cmH
Image 302 rotated 90degrees left - less successful
Image 304
Digital, vertical repeat of pattern - more successful than Image 303
Image 305
Original image with vertical overlaid strips - gives sense of movement
Image 306 - 15cmWx29cmH
Section of image overlaid with shapes cut from an Invert Adjustment in Photoshop Elements.
Details added with acrylic paint in sympathy with design.
Image 307 - 16cmWx29cmH
Background printed from Invert Adjustment of image and overlaid with diagonal strips from original image. Details added with acrylic paint in sympathy with design.
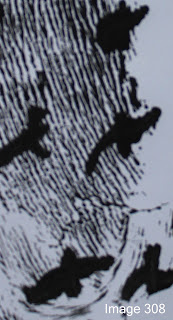
I didn't do any additional monoprinting in this section as I had already covered this in previous chapters. However I did take sections from Image 141 (Images 308 - 312) and produced designs from these (Images 313 and 314).


